

We have pics of all our family and friends coming out of our ears and Im always looking for new ways to showcase them and switch them up. So when my sis handed me an old pot of image transfer goo leftover from her uni days I decided to put it to work!
Ingredients:
- Canvas boards as big as you fancy
- Image transfer goo - the one we used (Dylon Image Maker) was for transfers to fabric, but it worked brilliantly with the canvas too
- Photos you want to transfer - printed out on regular weight paper (we chose three fun pics from our trip to Mexico)
- Regular paint brushes (not your boar bristles, this is no tender watercolour session!)
- Rolling pin! Will explain later...
Now lets get down and dirty:
 |
Take your printed photo, cut to desired size and generously apply the image maker to the surface. Remember your image will be inverted in the final product so take care with any words (or graffiti, doh!).
Once covered gently transfer on to the canvas, face down. We found it easiest to leave the goo coated photo in place and put the canvas on top (upside down), but give it a go and experiment. Also, if you apply the canvas from one side to the other you are less likely to get air bubbles trapped. Well, in theory!
But never mind - cause this is where the rolling pin comes in super handy! (We were having too much fun at this stage for picture taking, ha!). Once you're happy with the position of your image, use the rolling pin, apply a small amount of pressure and push out all the air bubbles under the photo. Soo satisfying!
Once you're happy you've busted all those bubbles it's down to a waiting game - until the goo is completely dry (according to the instructions), we left ours overnight.
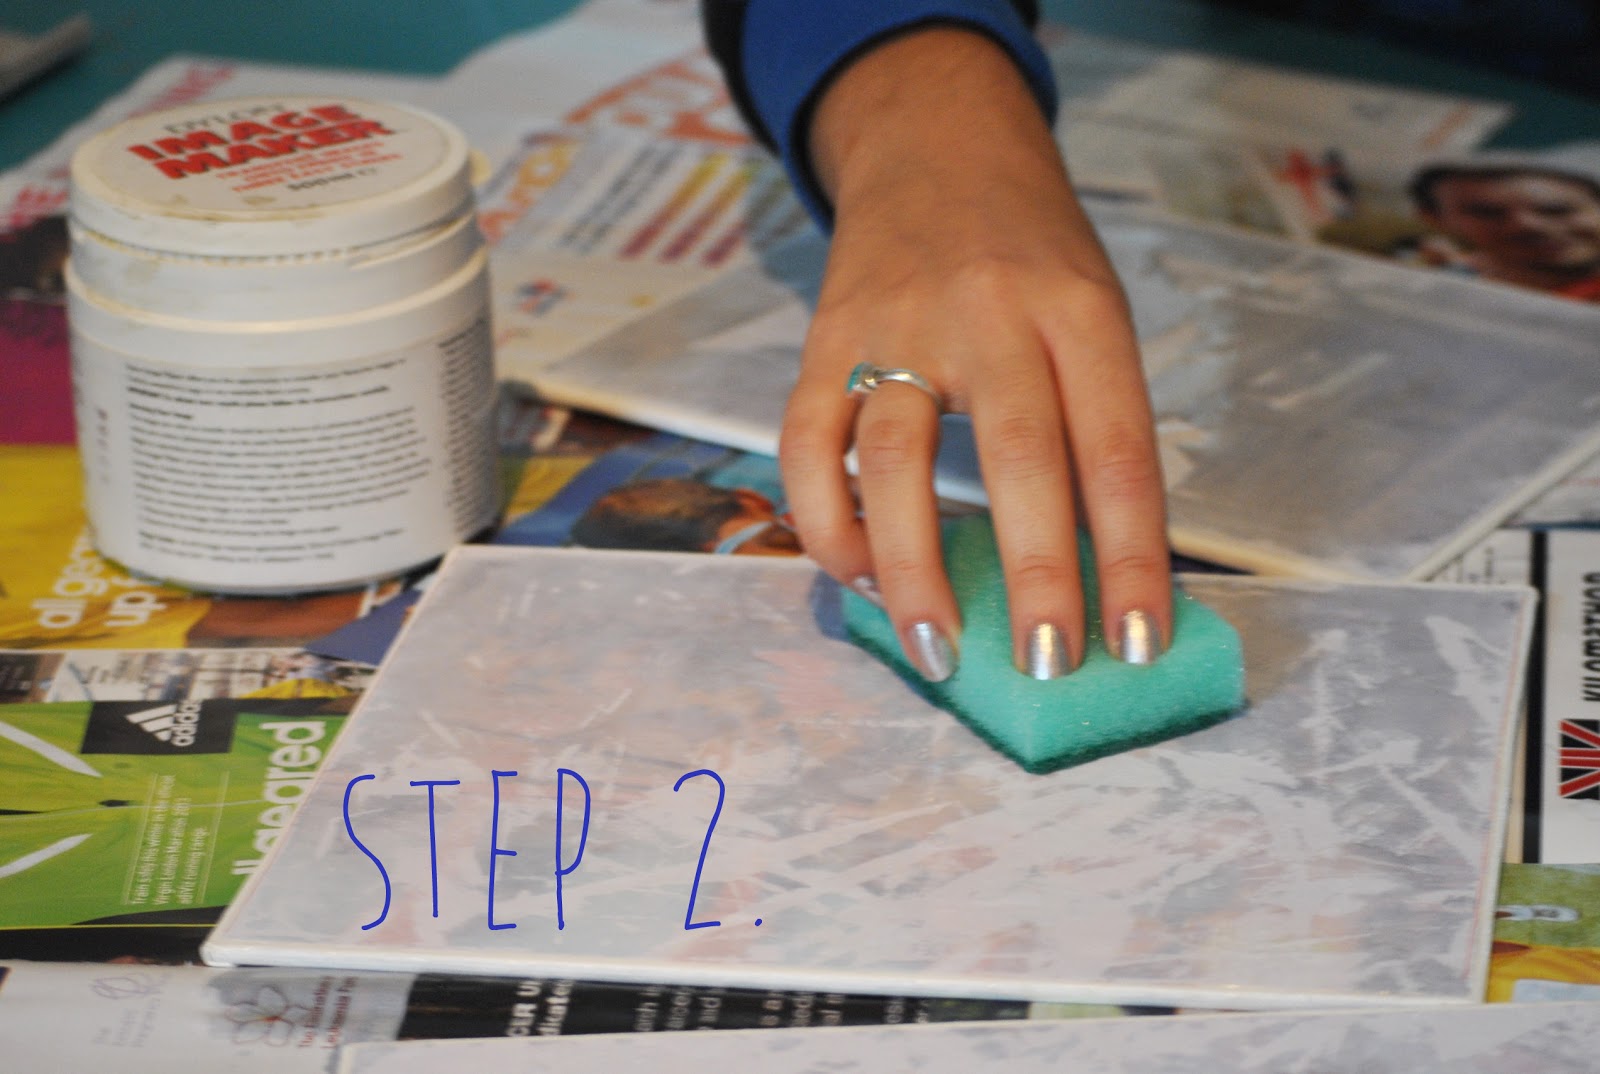
Take your dry canvas with the photo securely stuck on top and stat to dampen the paper with a sponge and some luke warm water. In fact you can be pretty liberal with the eau, pile it on (just not enough to warp your canvas if it's backed with cardboard like ours). This feels WIERD but it's right, so just fight your instincts and trust us.

Finally, once the paper starts to soften you can literally rub it away with your fingers or the sponge, leaving the image behind! Bingo! Looks simple, but kinda hard work - you think it's all gone but once it dries you find a white sheen has materialised - aka very thin layer of remaining paper. We had to give it about three goes until we were satisfied. (Patience is not my forte, thanks little sis!)
And that's it, hang or display your homemade canvas print with pride!


Being a renter (pah!) no pins in the wall for me, so I used bull clips and some cord to hang them. But what do you think of the final result - the images transferred waaaay better than I was expecting. Almost half tempted to take some fine sand paper to them to rustic them up a bit, but I'm sure age will give the same effect, ha!
I also recently came across this wicked use of photo transfers on Poppytalk - contributor post of an AWESOME decorated bench - so next time we're thinking BIG! :)
I LOVE photo transfer-- I did a project with it during a summer at art school. Yours turned out great, thanks for sharing! : )
ReplyDelete